Did you know saunas help you relax and feel great? Building the best outdoor steam sauna is fun and rewarding. This guide uses simple steps for beginners. You can create a cozy steam room in your backyard. Let’s start this exciting project together!
Why Build an Outdoor Steam Sauna?
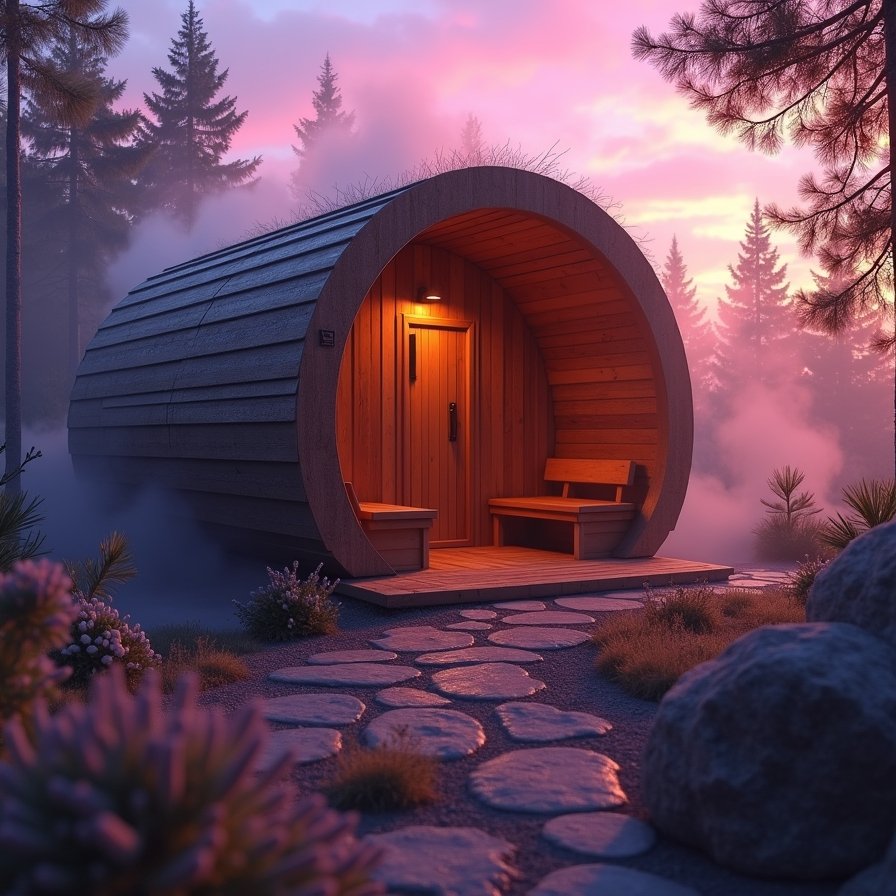
First, outdoor steam saunas offer health benefits. They improve blood flow and relax muscles. Also, steam helps your skin stay healthy. Next, an outdoor sauna gives privacy and peace. Finally, building one yourself saves money and feels amazing.
Moreover, saunas are great for stress relief. You can enjoy nature while relaxing. Additionally, a steam sauna is perfect for cold days. It warms you up fast. So, a backyard sauna is a smart choice.
Furthermore, building your own sauna is fun. You learn new skills. Also, you can customize it. For example, choose your favorite wood. Therefore, it’s a project worth trying.
Choosing the Perfect Location
First, pick a flat spot in your backyard. A level area makes building easier. Also, ensure the spot has good drainage. Next, check for privacy from neighbors. Finally, keep it close to water and power sources.
Moreover, a private spot feels relaxing. You don’t want people watching you. Additionally, a nearby water line helps with steam. Electricity powers the steam generator. So, choose a spot near your house.
Furthermore, avoid areas with too many trees. Roots can cause problems. Also, check local building rules. Some places need permits. Therefore, plan your location carefully.
Lastly, think about the view. A nice view makes your sauna time special. For example, face it toward a garden. This creates a calm vibe. So, pick a spot you love.
Gathering Materials and Tools
First, you need strong wood like cedar. Cedar resists water and heat. Also, get a steam generator for wet heat. Next, buy insulation and a vapor barrier. Finally, gather tools like a hammer and drill.
Moreover, cedar smells nice and lasts long. It’s perfect for saunas. Additionally, a good steam generator is key. It creates the best steam. So, choose a reliable one.
Furthermore, insulation keeps heat inside. A vapor barrier stops water damage. Also, you need screws and nails. A saw cuts wood to size. Therefore, make a list before shopping.
Lastly, consider a glass door. It looks modern and lets light in. Also, get a thermometer and hygrometer. These track heat and humidity. So, collect everything before starting.
| Material/Tool | Purpose | Estimated Cost |
|---|---|---|
| Cedar Wood | Walls, benches | $500-$1000 |
| Steam Generator | Creates steam | $300-$600 |
| Insulation | Retains heat | $100-$200 |
| Vapor Barrier | Prevents moisture damage | $50-$100 |
| Glass Door | Entry, light | $200-$400 |
| Hammer, Drill, Saw | Building tools | $50-$150 |
Preparing the Foundation
First, clear the ground of grass and rocks. A flat surface is important. Next, lay a gravel bed for drainage. Also, add concrete pavers for stability. Finally, check the level with a tool.
Moreover, a strong foundation keeps your sauna steady. Gravel stops water from pooling. Additionally, pavers make the base solid. This prevents sinking. So, take time to prepare well.
Furthermore, a level foundation helps with building. Uneven ground causes problems. Also, use a waterproof membrane. It protects the wood. Therefore, don’t skip this step.
Lastly, double-check your work. A good foundation lasts years. Also, it keeps your sauna safe. For example, no cracks or shifts. So, make it strong and flat.
Building the Frame
First, cut wood to the right size. Use 2x4s for a sturdy frame. Next, build the floor frame first. Also, add support beams for strength. Finally, screw the pieces together tightly.
Moreover, a strong frame holds everything up. Cedar 2x4s work great. Additionally, the floor frame needs extra support. This prevents wobbling. So, measure twice before cutting.
Furthermore, build walls next. Make them straight and tall. Also, leave space for a door. The frame shapes your sauna. Therefore, keep it neat and strong.
Lastly, check corners with a square. Right angles are important. Also, secure the frame to the foundation. This keeps it in place. So, build with care.
Installing Insulation and Vapor Barrier
First, add insulation to walls and ceiling. Use mineral wool for saunas. Next, cover it with a foil vapor barrier. Also, tape all joints tightly. Finally, check for gaps.
Moreover, insulation traps heat inside. Mineral wool is safe for high heat. Additionally, the foil barrier stops steam leaks. This protects the wood. So, install it carefully.
Furthermore, gaps let heat escape. This makes your sauna less cozy. Also, moisture can damage walls. A good barrier prevents this. Therefore, seal everything well.
Lastly, the ceiling needs extra insulation. Heat rises to the top. Also, use aluminum tape for seams. It’s strong and heat-safe. So, make it airtight.
Adding the Steam Generator
First, choose a steam generator for your sauna size. A 6KW model works for 4-6 people. Next, connect it to a water line. Also, hire an electrician for wiring. Finally, test it.
Moreover, the steam generator creates wet heat. It’s the heart of your sauna. Additionally, a good model heats fast. This saves time. So, pick a trusted brand.
Furthermore, place the generator outside the sauna. It needs a cool spot. Also, connect a steam line to the room. This sends steam inside. Therefore, follow instructions.
Lastly, test the generator before use. Check for leaks or issues. Also, ensure the drain line works. This keeps things safe. So, set it up right.
Constructing the Interior
First, cover walls with cedar panels. Use tongue-and-groove for a tight fit. Next, build two benches. Also, make them 18-24 inches wide. Finally, add a sloped ceiling.
Moreover, cedar panels look and smell great. They resist moisture well. Additionally, benches need strong supports. This holds weight safely. So, use cedar for benches too.
Furthermore, a sloped ceiling helps water drip off. This prevents soggy spots. Also, leave gaps between bench boards. This lets water drain. Therefore, plan the layout carefully.
Lastly, install vents for airflow. Place one near the floor. Also, add one high on the opposite wall. This keeps air fresh. So, make the interior cozy.
Installing the Door and Accessories
First, hang a tempered glass door. It’s strong and safe. Next, add weatherstripping around it. Also, install a thermometer and hygrometer. Finally, place a bucket and ladle.
Moreover, a glass door lets light in. It makes the sauna feel open. Additionally, weatherstripping stops steam leaks. This keeps heat inside. So, seal the door well.
Furthermore, a thermometer tracks heat. A hygrometer checks humidity. Also, the bucket holds water for steam. A ladle pours it safely. Therefore, add these for comfort.
Lastly, consider LED lights. They create a relaxing mood. Also, use wooden accessories. Metal gets too hot. So, choose items that are safe.
Finishing Touches and Safety Checks
First, sand all wood surfaces. Smooth wood feels nice. Next, apply a sealant to cedar. Also, check vents and wiring. Finally, test the sauna fully.
Moreover, sealant protects wood from moisture. It extends the sauna’s life. Additionally, vents need to work well. This ensures safety. So, inspect everything carefully.
Furthermore, test the steam generator again. Make sure it heats properly. Also, check the door for leaks. A tight seal is important. Therefore, don’t rush this step.
Lastly, clean the sauna before use. Remove dust and debris. Also, add towels for comfort. This makes it ready. So, enjoy your new sauna!
Maintaining Your Outdoor Steam Sauna
First, clean the sauna weekly. Wipe benches and walls. Next, check the steam generator monthly. Also, inspect wood for damage. Finally, replace parts as needed.
Moreover, cleaning keeps the sauna fresh. It prevents mold growth. Additionally, a working generator ensures steam. This maintains comfort. So, stay on top of upkeep.
Furthermore, look for cracks in wood. Moisture can cause issues. Also, check vents for blockages. Good airflow is key. Therefore, maintain it regularly.
Lastly, store the bucket and ladle dry. This prevents rust. Also, keep the door sealed tight. This saves heat. So, care for your sauna well.
Conclusion
Building an outdoor steam sauna is a fun project. You now know the steps. From picking a spot to adding a steam generator, it’s simple. Also, use cedar for the best results. So, start today and enjoy your cozy backyard sauna soon.